
Back story:
After watching Marvel’s Iron Man Movie, we all start thinking ourselves to be an Iron Man in our life and the first step to take this is to make the smart assistant “J.A.R.V.I.S.” but that’s more of software than hardware. Once you start researching, you will find hundreds of projects making their own J.A.R.V.I.S but isn’t that looks like we are reinventing the wheel because Amazon had already invested millions of dollars on the research and development of ALEXA. Now, we just need to change the wake word (a word that is used to wake up your voice assistant, Alexa in case of Amazon Echo). But that’s not that straight forward to do the same. You can only change the name of Alexa to either “computer” or “Echo”.
And I don’t wanna mess up with software much. So, what I did is I used an external hardware to detect my custom wake word and speak up “Alexa” or “computer” or “Echo” or any other name of your voice assistant. And that’s it!
Hardware Required*:
I’m expecting you already own Amazon Echo 3 (works with others too )
- Arduino Nano (you can also use Arduino Uno/mega/pro mini)- Buy Here
- DF Robot’s DF Player mini – Buy Here
- DF Robot’s Offline Voice recognition module – Buy Here
- USB Cable- Buy Here
- Mini speaker- Bought from local market
Tools and equipments:
- Soldering iron (along with soldering wire)
- Hot glue gun (Optional)
- 3D Printer or a friend with 3D Printer😂 (Optional)
Software:
- Arduino IDE- To program your Arduino board
- Prusa slicer- To Slice your 3D Model of Enclosure
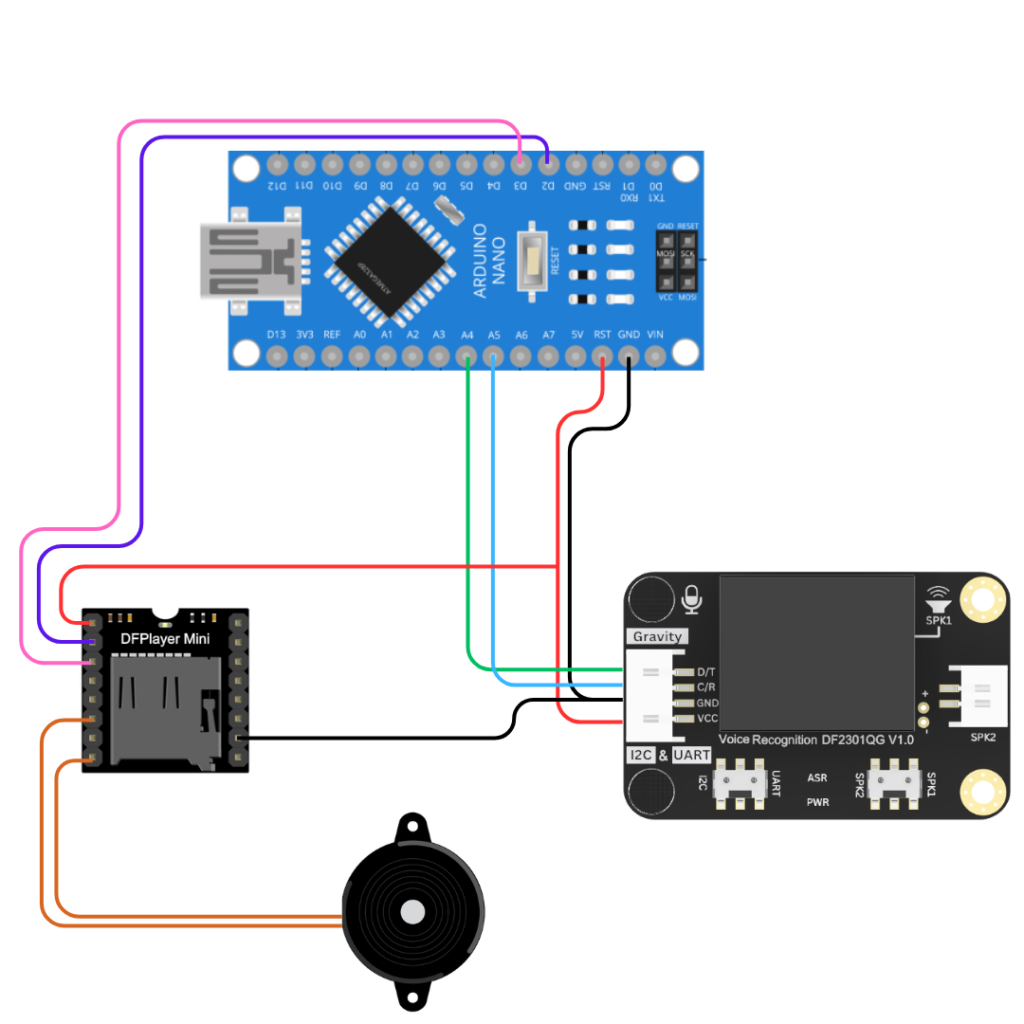
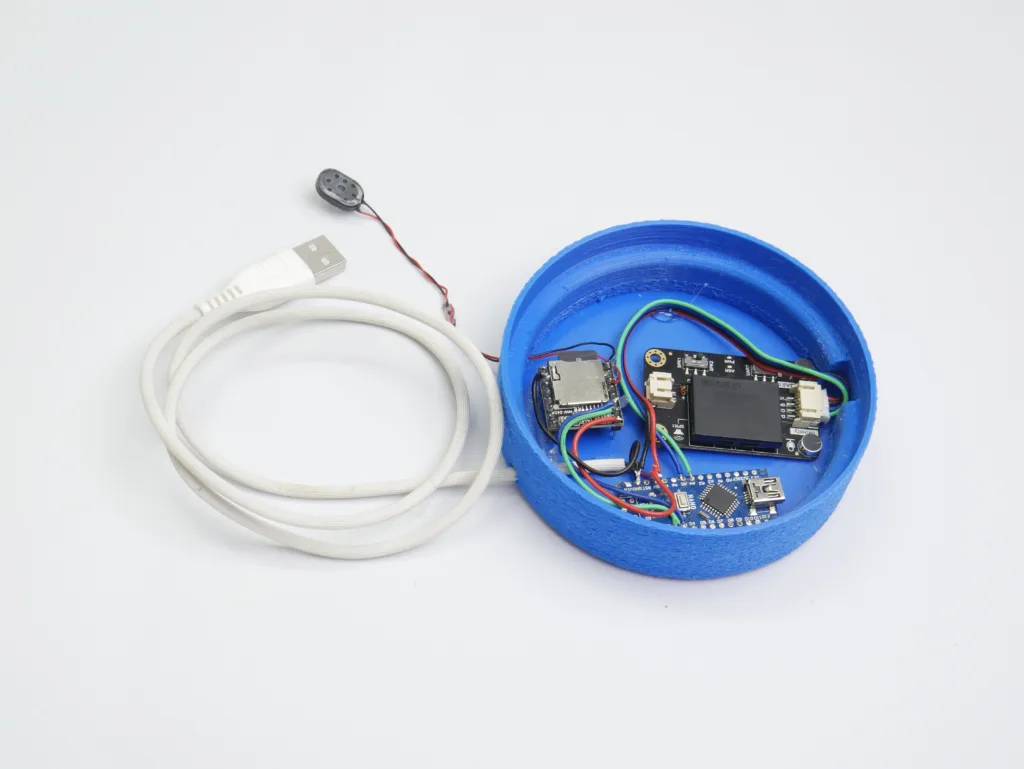
Connection Diagram:
Tip: If you are also 3D Printing the bottom case, please connect the speaker at last and pass the wires through the given hole.
Code:
I knew this you were eagerly waiting for this section, jump in and understand how the code actually works 🙂
Before jumping in, download the required libraries, which are for Offline Voice Recognition module and DF Player mini: Click here!
/*Love the project? Consider Supporting :)
https://www.linktr.ee/padmalaya_rawal */

#include "DFRobot_DF2301Q.h"
#include "SoftwareSerial.h"
#include "DFRobotDFPlayerMini.h"

//I2C communication
DFRobot_DF2301Q_I2C DF2301Q;

// Use pins 2 and 3 to communicate with DFPlayer Mini
static const uint8_t PIN_MP3_TX = 2; // Connects to module's RX
static const uint8_t PIN_MP3_RX = 3; // Connects to module's TX
SoftwareSerial softwareSerial(PIN_MP3_RX, PIN_MP3_TX);

// Create the Player object
DFRobotDFPlayerMini player;

void setup() {

  Serial.begin(115200);

  // Init serial port for DFPlayer Mini
  softwareSerial.begin(9600);

  // Start communication with DFPlayer Mini
  if (player.begin(softwareSerial)) {
   Serial.println("OK");

    // Set volume to maximum (0 to 30).
    player.volume(15);
    // Play the first MP3 file on the SD card
    player.play(1);
  } else {
    Serial.println("Connecting to DFPlayer Mini failed!");
  }

// Init the voice reognition module
  while( !( DF2301Q.begin() ) ) {
    Serial.println("Communication with device failed, please check connection");
    delay(3000);
  }
  Serial.println("Begin ok!");
  DF2301Q.setVolume(2);
  DF2301Q.setMuteMode(0);
  DF2301Q.setWakeTime(15);

  uint8_t wakeTime = 0;
  wakeTime = DF2301Q.getWakeTime();
  Serial.print("wakeTime = ");
  Serial.println(wakeTime);

  // DF2301Q.playByCMDID(1);   // Wake-up command
  DF2301Q.playByCMDID(23);   // Common word ID

}

void loop() {
  // Check for CMID from DF2301Q
  uint8_t CMDID = 0;
  CMDID = DF2301Q.getCMDID();

  if (CMDID == 1 ) {
    Serial.println("Specific CMID detected, playing audio file 1.mp3");
    player.play(1);
    // You can add additional logic or commands here as needed
  }
delay(500);

}
Is your project working? I bet it’s not because you will need an audio file that you will save to the Micro SD Card that will go to DF Player mini. In my case, I have changed the name of my Amazon Echo Dot to “Echo” than default “Alexa” which can also do by going to Amazon Alexa mobile app. If you have also changed the name to “Echo” like I did, you can down the audio file here. Else you can either record a mp3 with your own voice saying the wake word (Alexa, Echo, Hey Google, Hey Siri, etc…) or use any online text to speech convertor website to achieve the same results. Make sure to change the name of audio file to “01.mp3”, only then it will work. Please note that if you are thinking to change the name in the code as per the audio file name, it won’t work, DF Player mini only support the numerical file names.
Once you are done uploading the code, now you have to add your custom wake-up word to the DF Robot’s Offline Voice Recognition module by following the below steps:
- Initiate the voice assistant by employing the default wake-up word, which is “Hey, robot”
- Utter “Learning wake word”
- Speak the designated wake-up word to be acquired: “Hey, JARVIS”
- The module will indicate by saying “Learning successful, please say it again!”
- Speak the designated wake-up word to be acquired again, which is “Hey, JARVIS”
- The module will again indicate by saying “Learning successful, please say it again!”
- Speak the designated wake-up word to be acquired again, which is “Hey, JARVIS”
- The module will indicate by saying “OK, Learning completed”
Slicing:
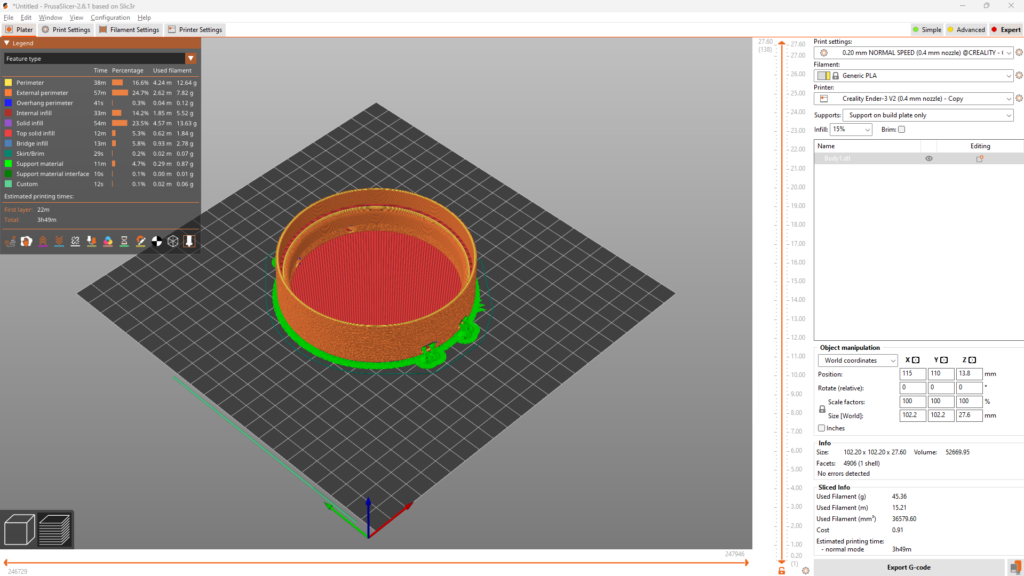
Download the below stl file and by using any of your favorite Slicing software, slice it. I have used Prusa Slicer and the following are the details that you are looking for
- Bed Temperature- 60C (Room Temperature- 10C)
- Nozzle Temperature- 210C (Room Temperature- 10C)
- Support- Yes(Organic)- On build plate only
- Infill- 15%
- Nozzle- 0.4mm
- Layer height- 0.2
If you need to edit the 3D model of the same please comment, and I will share the step file 🙂
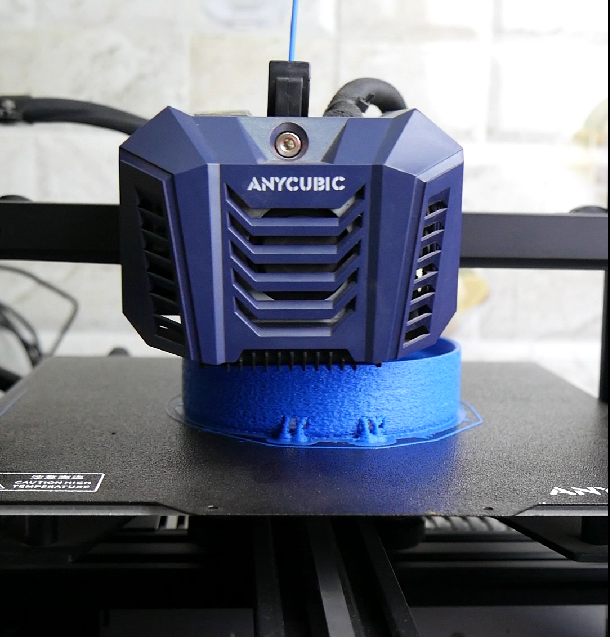
3D Printing:
3D Print the slice model and here are the details that you might need:
- Material- PLA+
- Time to Print- 3hr 49min
- Material weight- 45.36g
Assembling:
The assembly is very straightforward, just follow the circuit diagram and you are good to go. The only thing you have to keep in mind is to connect the Power cable and the speaker at the end by inserting their wires from the circular holes provided. Rectangular holes are for the microphones of the Offline Voice recognition module. There is a slot provided inside on the back of the rectangular holes section and that’s for the Gravity connector.
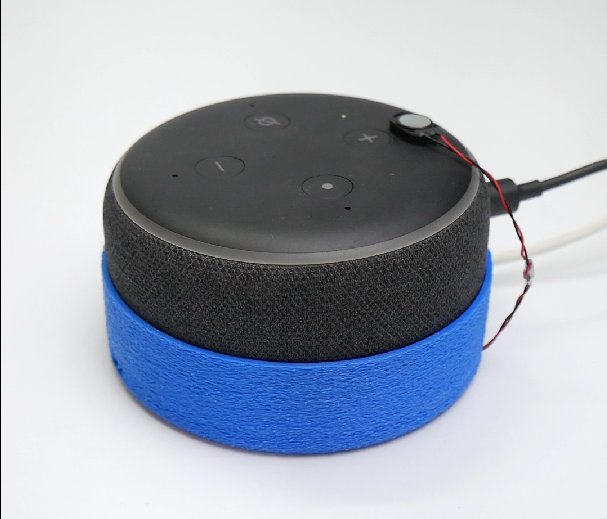
Place your Alexa Echo Dot Gen 3 on the top and stick the speaker on one of the 4 microphones of the Echo Dot as shown above.
Working demo:
Connect with the creator for more:
Padmalaya Rawal
Disclaimer:
The buy links in this article are affiliate links, If you buy from those links, I will get a very small commission at no extra cost to you that will help me to put out more such crazy articles.